What is the quickest way to navigate in Calendar Plus?
Calendar Plus is one of Bamboo Solutions’ most popular and useful products, and today we will be showing you the best ways that you can use Calendar Plus for your company!
Calendar Plus offers multiple options for quick and seamless navigation. From the toolbar at the top of our Calendar Plus WebPart you can jump to different places and change to different views of your data.

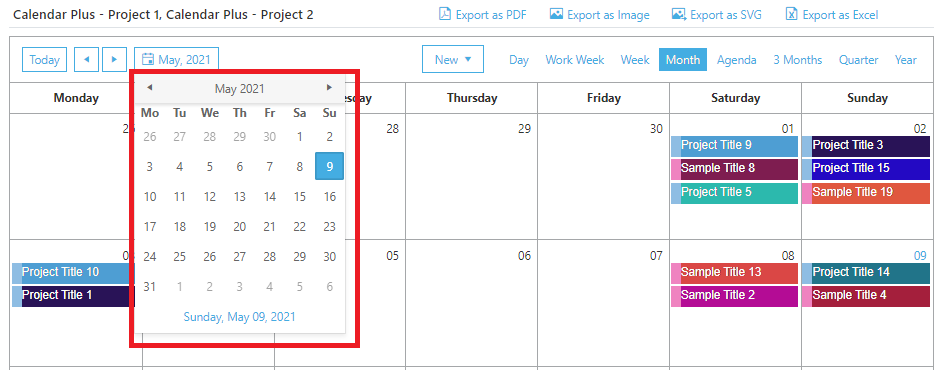
On the top left you have a button “Today” which will jump you back to your default view of the calendar from wherever you are within the Calendar Plus WebPart. Next to the “Today” button, there are a left arrow and right arrow, these arrows allow you to move over one unit. Say for instance you are in the “Month” view, hitting the right arrow will take you forward a month. If you happen to be in the week view, the right arrow will take you forward a week, and so on. Finally, next to the calendar you have a field displaying the current date, clicking on this will manifest a drop-down mini calendar which you can use to navigate quickly to a specific date.
Located at the top right of the Calendar Plus WebPart are the options to navigate to different grouped views of your data. Our Calendar Plus WebPart allows the owner of the WebPart to assign which of these they would like their users to access upon opening the Calendar Plus WebPart. By default, it is set to the month view when you receive it, but you can change it to any of the other views listed here. The views we have available for sorting and navigating your data are: Day, Work Week, Week, Month, Agenda, 3 Months, Quarter, and Year.
Calendar Plus WebPart also offers the ability to filter your data using the legend. Our legend can be toggled on and off, and the function to use it as a filter can also be toggled on and off, depending on the use case of the organization. If needed, all of the options in the legend are clickable, the user can click off all the items they do not wish to see in their view to more easily consume in the information they are seeking specifically.

How to use the various visual organization tools available in calendar plus?
As previously mentioned, the Calendar Plus WebPart offers a legend that can be toggled to allow for the filtering of data. When toggling off options, the options will appear grey in the legend, to indicate that data is toggled off, in the below capture the entire calendar “Project 2” is toggled off.

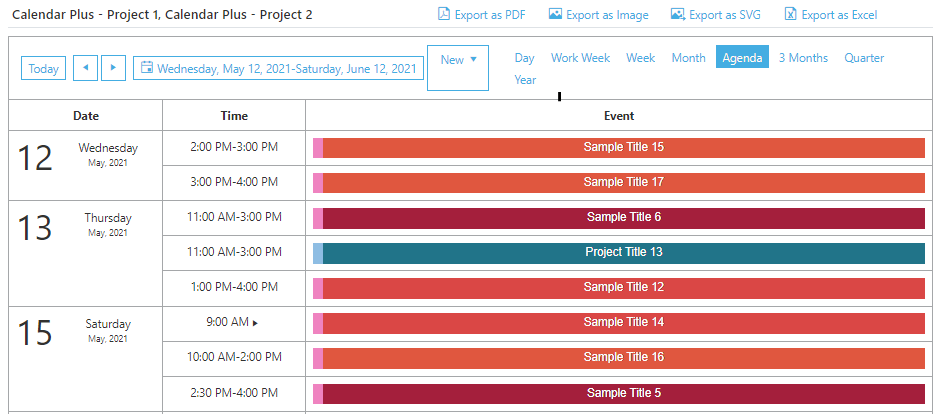
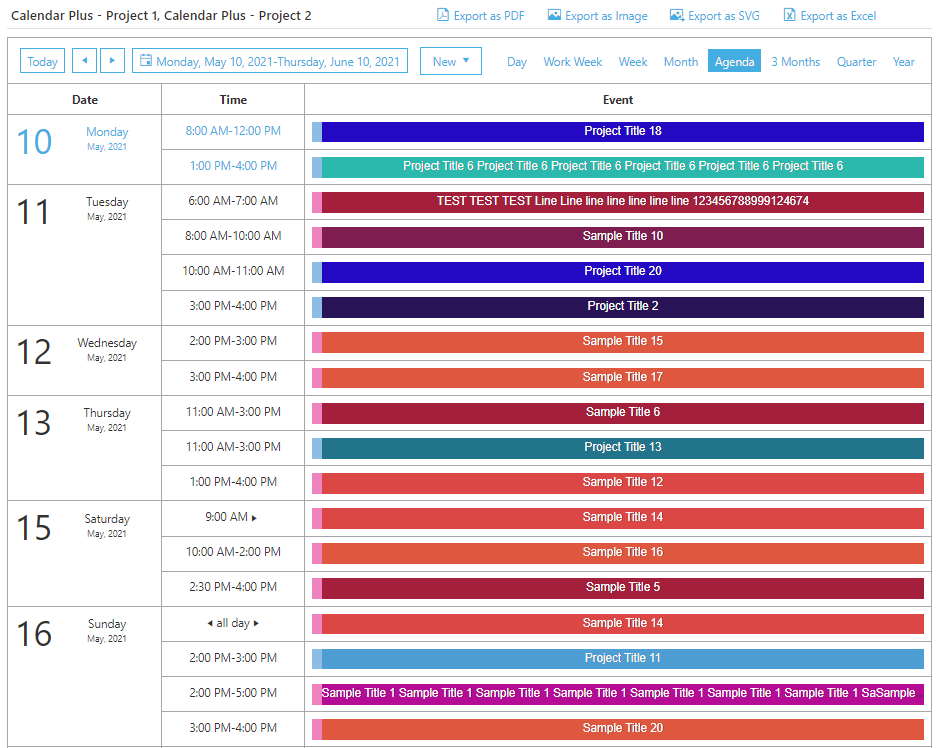
Another feature that the Calendar Plus WebPart offers is to optimize the visual organization of data are our different view options. Each view is custom developed to offer different windows of time, to consume your data more easily as your use case requires. Below is a screen capture of the Calendar Plus WebPart Agenda view. All of our views work in tandem with our filterable legend.
How to integrate calendar plus into your company?
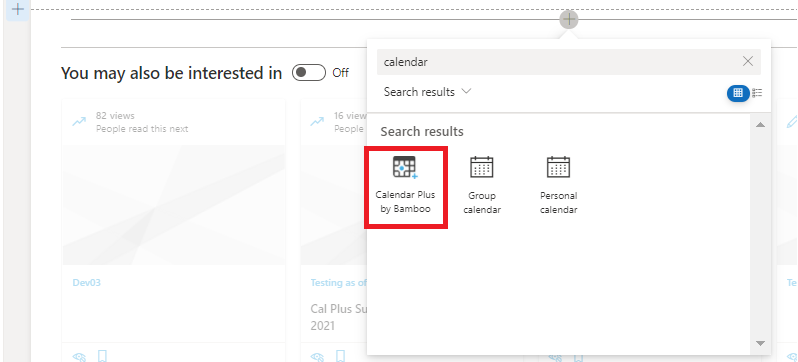
The Calendar Plus WebPart offers many features to integrate seamlessly into any company’s existing tenant(s). As with all of our WebParts, Calendar Plus WebPart can be placed on any page within your existing organization once it has been installed and added to your AppCatalog. Our products are designed to be added to a page like you would add to any other out-of-the-box SharePoint WebPart. Calendar Plus WebPart can be added to both modern and classic pages, however, it will always have a modern appearance to it even if placed onto classic pages.
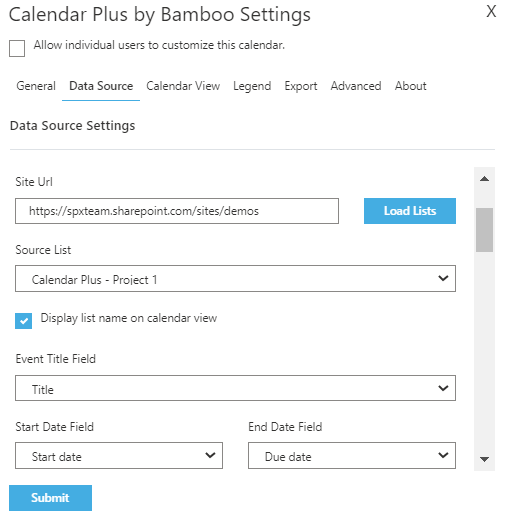
Once the Calendar Plus WebPart has been added to a page you will proceed to populate the calendar with all your existing data. There’s no need to create anything new for our Calendar Plus WebPart! All that is required to add the data is to load up your existing calendars in the Calendar Plus WebPart. There are no restrictions, while your of the box SharePoint combined calendars have a limitation of 10 calendars and must all be within the same site collection, Calendar Plus WebPart can roll up the data of an unlimited number of calendars and can pull data from multiple different site collections. As shown below, all that is needed to populate the data is to load up the site collection, select the list from which data should be pulled, and assign your one-to-one matches.
How to easily share your calendar with your team?
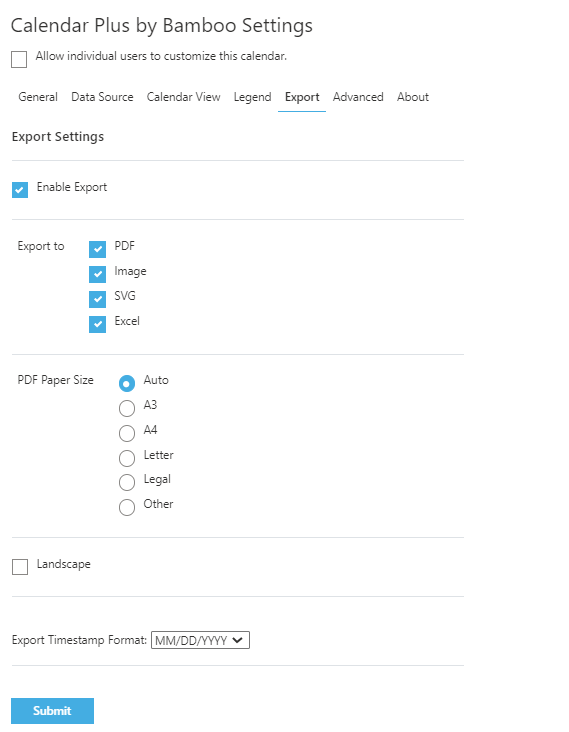
The Calendar Plus WebPart offers four different options to export the calendar. These exports will pull a view of the WebPart that you are on at the time that you choose to export the data. The options available to export are: PDF, Image, SVG, or Excel.

Based on your organizational needs, in the settings for the Calendar Plus WebPart, you can also toggle which export options you would like to be available for you and your users. In addition, the PDF paper size and orientation can be assigned, and the timestamp format can be customized.
How to customize your calendar to your personal need?
The Calendar Plus WebPart comes to you with a number of default settings that are most commonly requested and thusly can be used straight away with very few tweaks and customization. However, should you choose to customize your Calendar Plus WebPart for your use case and organizational needs there are various different settings available that can be changed.
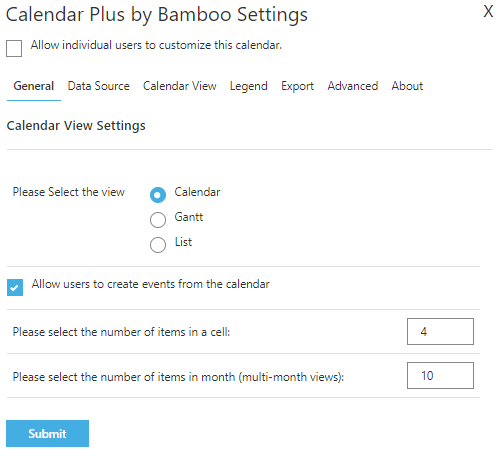
The general settings for the Calendar Plus WebPart allow the owner to customize the following options:
- Allow users to customize calendar or not
- View data in a calendar format, Gantt format, or list format
- Allow users to create events from the Calendar Plus WebPart or not
- Default number of events that can appear within a cell
- Default number of items in a month that are visible in any of the multi-month views
After marking the settings, you can move on to another tab to further customize or hit submit to view the changes you’ve just input.
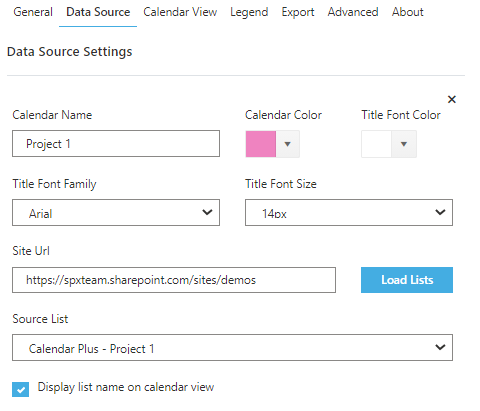
The Data Source tab in the setup for the Calendar Plus WebPart offers a great deal of customization. Here is where you pull in the data that will populate your Calendar Plus WebPart and then customize how you would like this data to appear. You have the option to assign a unique color to each calendar as you pull them in. In addition, you can assign event title font color, family, and size. There is a toggle check box that allows you to choose whether you would like the list name displayed at the top of the Calendar Plus WebPart as well.
Further down the options available under data source, you can denote which fields should appear on the tooltip, multiple fields can be selected. Next, you have the option to further color code your calendar by another category, simply select the field from the list you would like to color code and then select the options within the field that you would like to appear and the color you would with which you would like them to be represented.
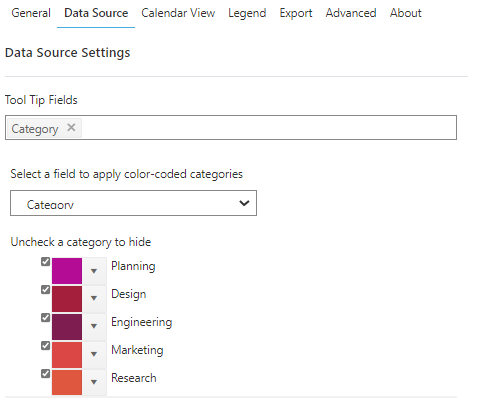
Every individual list you pull into your Calendar Plus WebPart has these options uniquely available to it. This allows you to use our customization to create visual differences between your data to help more quickly consume the information that is specific to the user.
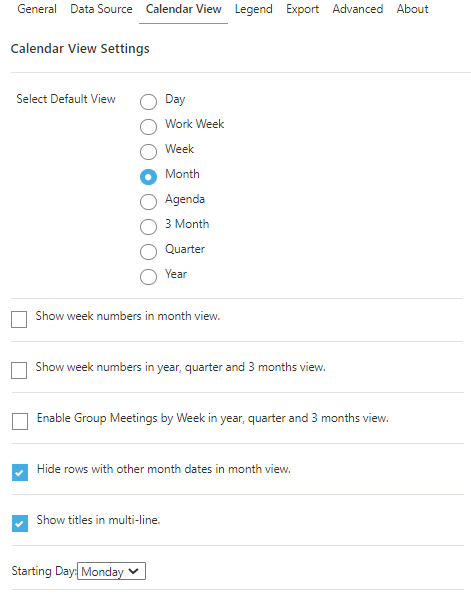
The Calendar View tab in the settings for your Calendar Plus WebPart offers the following options for customizations to refine your calendar view defaults:
- Customize which view your WebPart opens to automatically
- Toggle week numbers appearing in month view
- Toggle week numbers appearing in the year, quarter, and 3 months view
- Enable Group Meetings by week in 3 views
- Toggle rows with other month dates appearing in month view
- Toggle allowing event title to wrap text
Set week start day to either Monday or Sunday
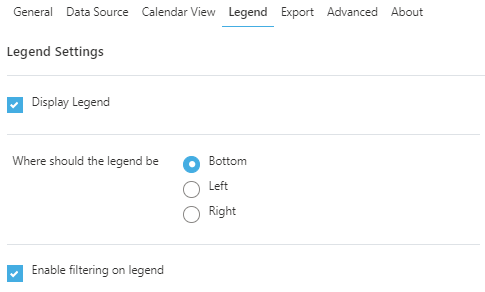
The Calendar Plus WebPart offers a filterable legend appearing by default at the bottom of your webpart, however, there are ways to customize this as well. The legend can be set to appear at the bottom, to left, or to the right of your WebPart. The legend can also be completely toggled off if not necessary. The filter functionality of the WebPart can also be toggled on and off.
As mentioned above, the methods with which to share and export the calendar are customizable as well, here is a reminder of the options available within the Calendar Plus WebPart. The ability to export can be toggled on and off, as can the format in which it can be exported. PDF settings for export can be predetermined as well in terms of size and orientation.

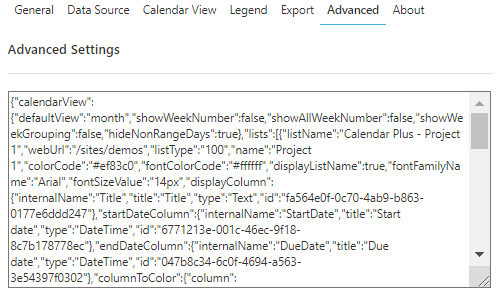
And lastly, if all of the above options are not sufficient for you to customize the appearance of your calendar, or maybe it has just a little too much GUI for your taste, you can always navigate to the Advanced tab and directly manipulate the HTML.
How to navigate between the various calendar views?
The Calendar Plus WebPart comes with eight different views with which a user can consume their calendar data. Navigating these views is easy! All one needs to do is click the name of the view they would like to see. As mentioned previously, the Calendar Plus WebPart comes with the Month view as the default view upon opening, but this can be customized to open to any of the other seven views available depending upon organizational requirements.

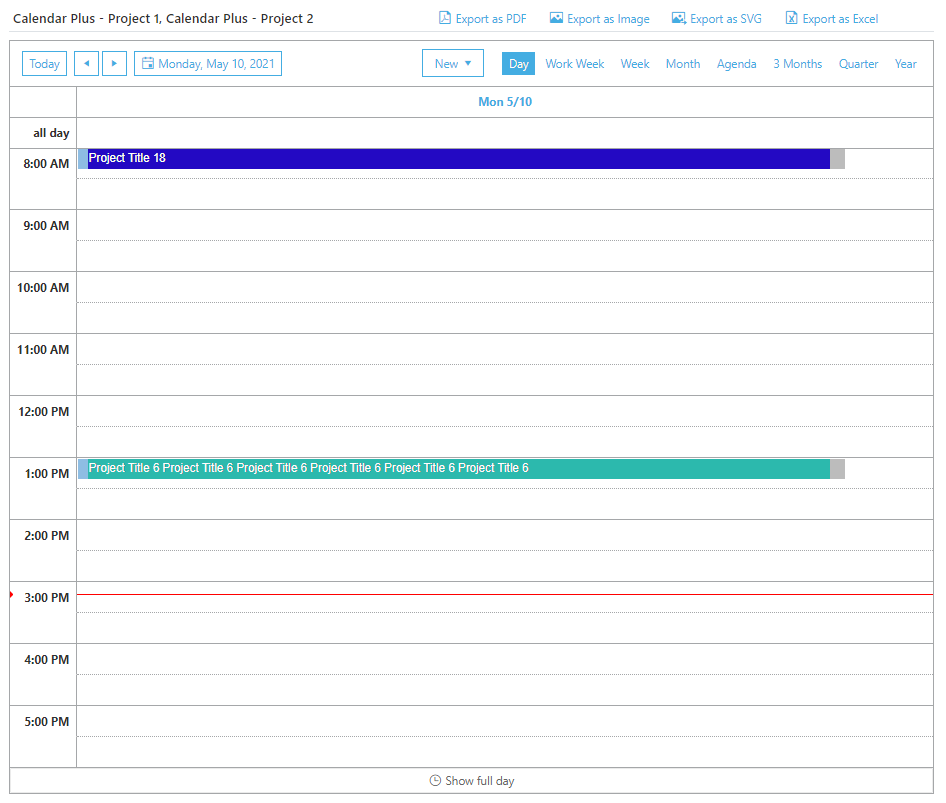
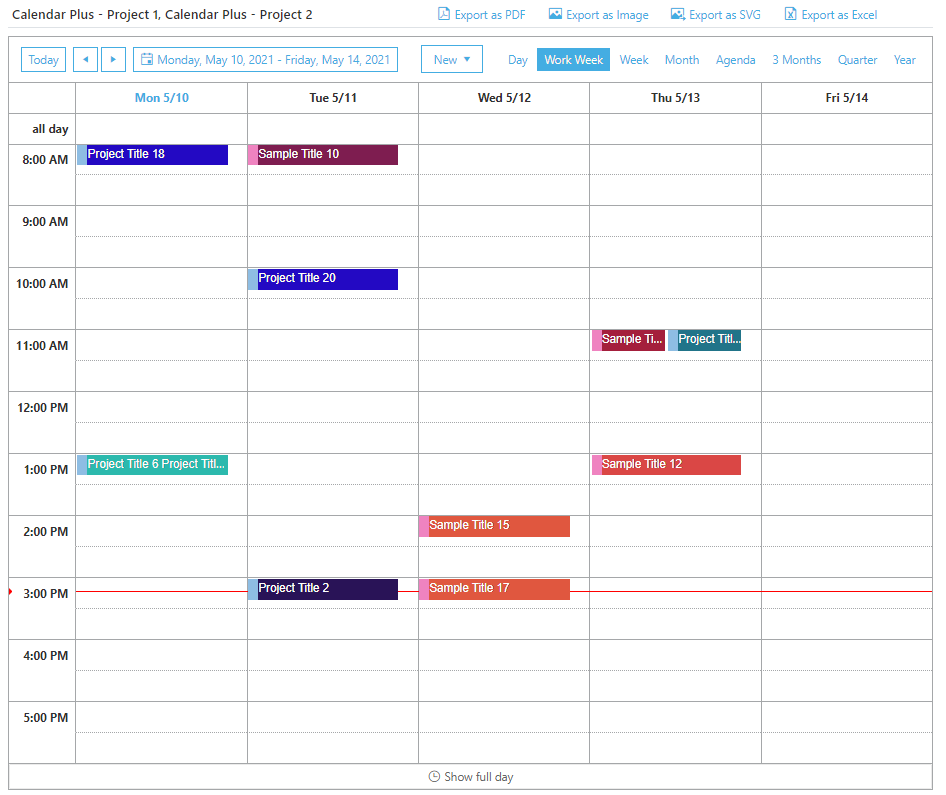
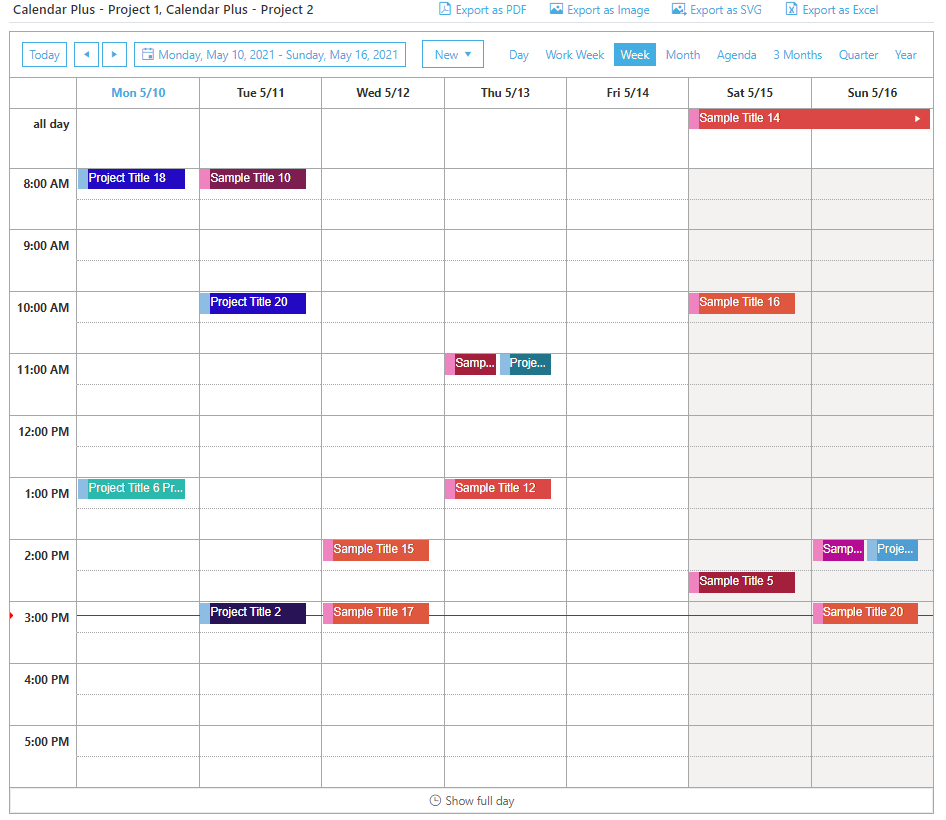
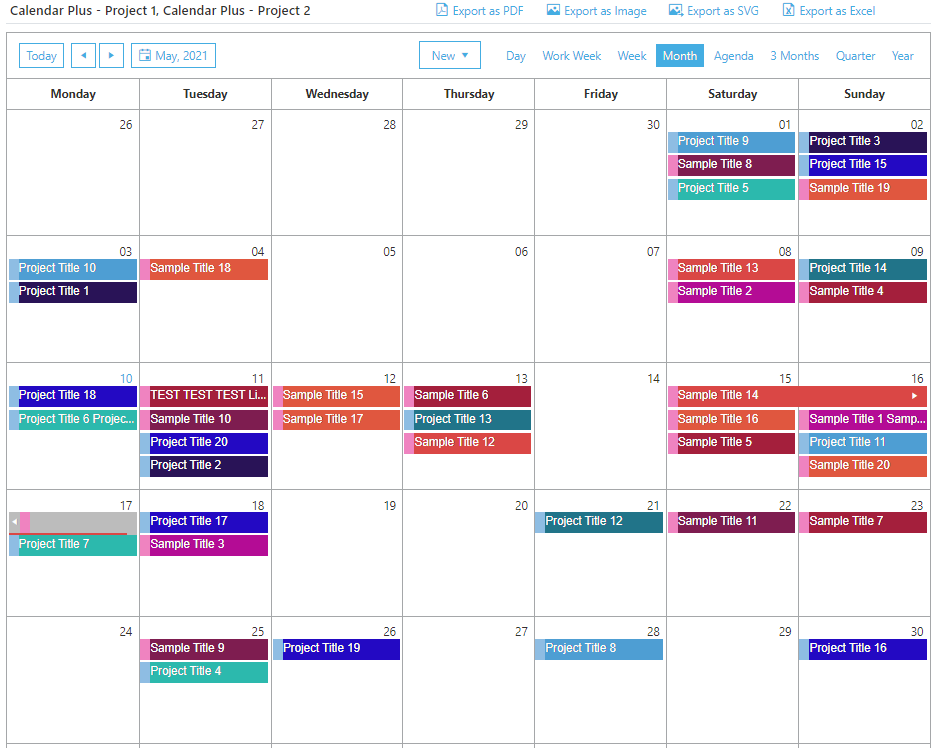
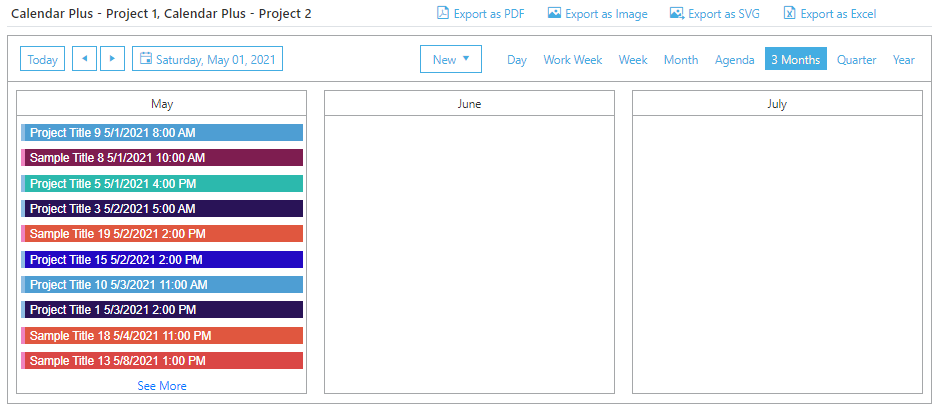
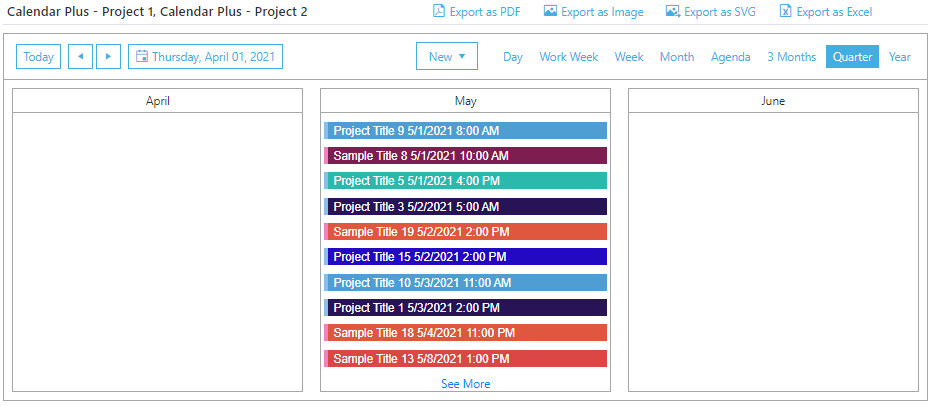
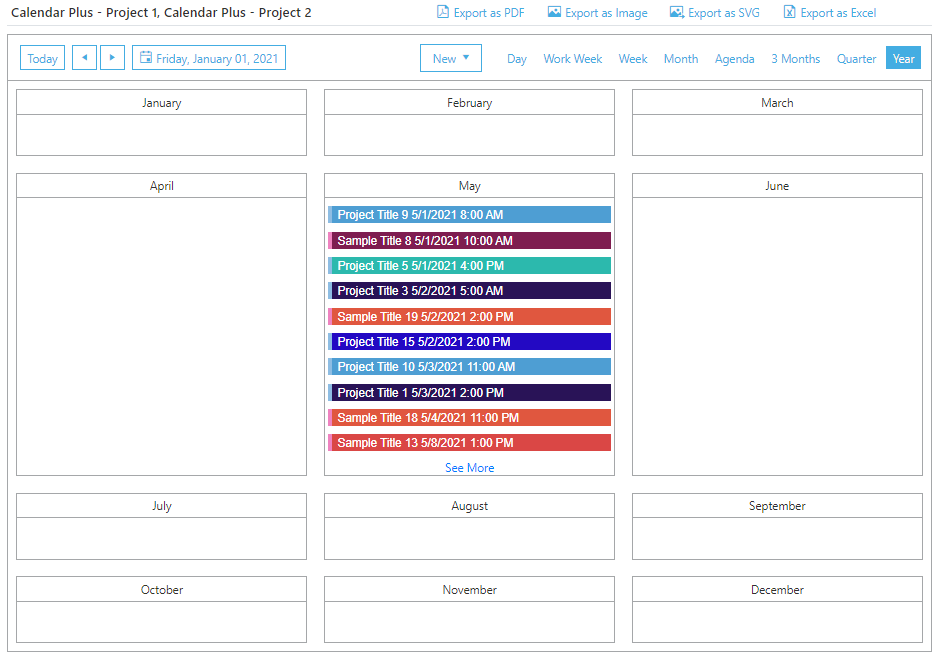
Below are examples of what each of the calendar views in the Calendar Plus WebPart looks like:
Day
Work Week
Week
Month
Agenda
3 Months
Quarter
Year
How to create and manage data in calendar plus?
The Calendar Plus WebPart is able to roll up and display data from any existing lists or calendars. Data within the lists or calendars that are manipulated directly on said lists of calendars will automatically be updated on the Calendar Plus WebPart. However, if a user does not want to navigate directly to each individual list or calendar that feeds the Calendar Plus WebPart, they can always use the webpart to update any existing events. They can also create new events and specify to which list of calendar these events should be assigned.
To update an existing event, one simply needs to click on the event they wish to update, which will pop open a window that first allows you to view the event and has an option to select if you wish to edit the event.
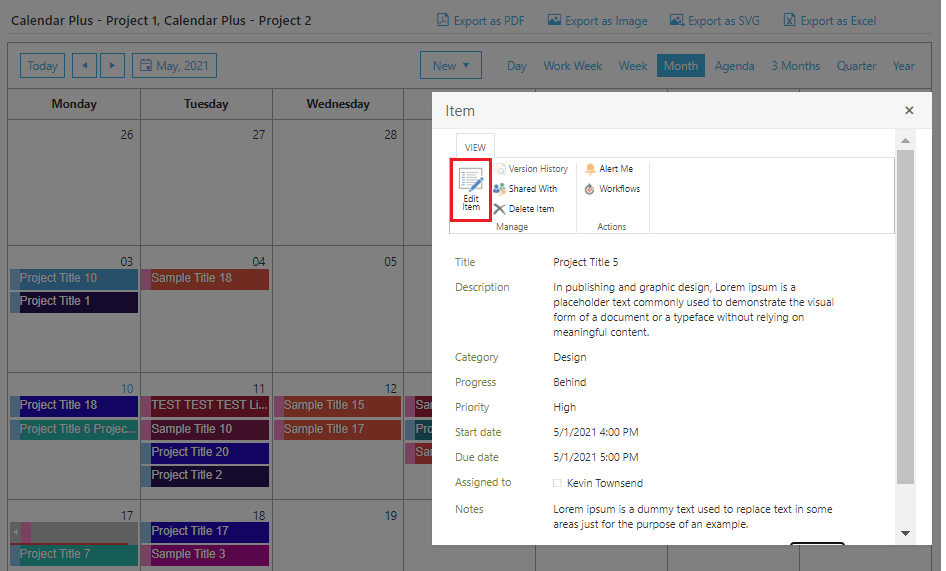
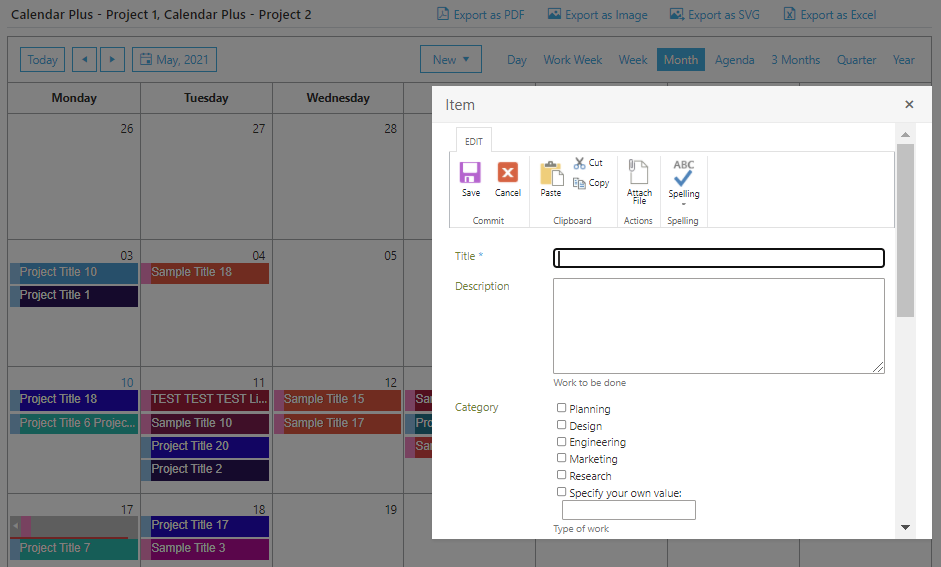
To create a new event with the Calendar Plus WebPart, simply click the New button drop-down on the toolbar at the top, and then select to which list/calendar you would like the new event applied.

After you select the list/calendar the new event should be added to using the Calendar Plus WebPart, a popup on the same page will appear allowing you to fill in all the fields required to create your new event.
